To give you an idea of how OpenXML and Word
Automation Services can be used together to build useful
line-of-business applications, consider the following demonstration
scenario:
You’ve been engaged by AdventureWorks to design and
build a document creation and collaboration tool. The tool will be used
by the company’s sales department for producing sales proposals. Each
proposal is made up of a number of different documents contributed by
various users from different departments. The tool to be built should
combine these documents into a single read-only document that can be
sent to the customer for consideration.
The input documents will be saved in Microsoft Word OpenXML format. The output document should be in Adobe Acrobat (PDF) format.
Architecture
You need to consider the following points to create an architecture that fits this scenario:
Multiple documents will logically make up a
single set. Bearing this in mind, we can use the Document Set
functionality .
By using OpenXML, we can combine a number of different types of documents into a single OpenXML document.
Word Automation Services can be used to convert the output OpenXML document into an Adobe Acrobat–compatible file.
Because
the process of combining documents is likely to be long-running, we
have two possibilities: we could use the SPLongOperation object, which
will present the user with the familiar spinning disc image while the
process runs. Or we could use a custom job on the server, which will
free up the user to perform other activities while the process
completes. For the purposes of our demonstration, we’ll use the custom
job approach since it illustrates functionality that is useful in many
development situations.
Bearing these points in mind, we can create a custom
content type that derives from the Document Set content type. We’ll then
develop a custom web part control that will provide a user interface
for combining the contents of our custom content set. To do the actual
combination, we’ll create a custom job that uses OpenXML and Word
Automation Services to put the finished document together and convert
the output to PDF.
1. Creating a Custom Content Type
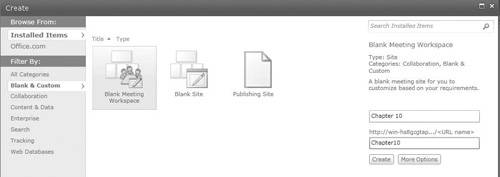
First we’ll create a new bank site and then provision
the Document Set content type before we add a custom content type and
define our user interface.
From the Site Actions menu, create a new Blank Site named chapter 10, as shown:
Enable the Document Sets feature. From the Site Actions menu, select
Site Settings | Go To Top Level Site Settings | Site Collection
Features. Activate the Document Sets feature.
We’ll
next add a custom content type for our Sales Proposal. Navigate back to
the blank site that we created earlier
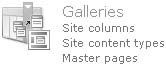
(http:///Chapter10). From the Site Actions menu,
select Site Settings. In the Galleries section, select Site Columns, as
shown.
Create a new column named JobId of type Single Line Of Text. Save the column in the Custom Columns group.
Create a new column named TemplateUrl of type Single Line Of Text. Save the column in the Custom Columns group.
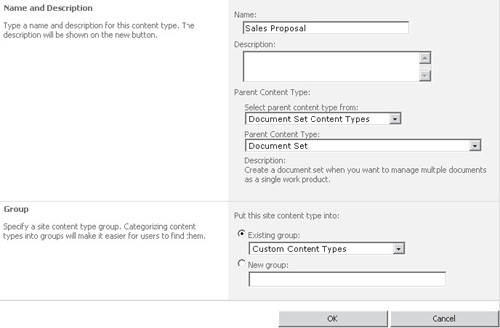
Navigate back to the Site Settings page, and then select Site Content Types from the Galleries section.
Create a new content type named Sales Proposal. Set the Parent Content Type field to Document Set and save it within the Custom Content Types group, as shown:
With
our new content type created, we can add in the site columns that we
created earlier. In the Columns section, click Add From Existing Site
Columns. From the Custom Columns group, add the JobId and the
TemplateUrl columns. Click OK to commit the changes.
Note
We’ve largely skipped over content types and site columns here.